Hour Hot Dog Buns, Homemade Hot Dog Buns Recipe
If you have ever wished for fluffy, soft, and incredibly satisfying hot dog buns made from scratch in about an hour, then these Hour Hot Dog Buns, Homemade Hot Dog Buns are exactly what you need. This recipe combines simple pantry staples with a fuss-free technique that delivers bakery-quality buns at home, perfectly pillowy and golden, ready to cradle your favorite sausages with ease. Whether you’re planning a weekend cookout or craving a nostalgic childhood treat, these homemade hot dog buns will elevate every bite and make the whole experience even more delightful.
Ingredients You’ll Need
Getting started with this recipe is easy because it uses familiar, everyday ingredients that every kitchen likely already has. Each one plays an important role, whether it’s the flour giving structure, the yeast bringing that perfect rise, or the egg wash creating a gorgeous, shiny finish.
- 2 ½ cups all-purpose flour: The backbone of the dough, this flour provides the structure and chewiness in every bun.
- 2 teaspoons instant yeast: The magic that makes your buns rise beautifully and stay fluffy.
- 2 tablespoons sugar: Adds just enough sweetness to balance the flavors and feed the yeast for a proper rise.
- 1 teaspoon salt: Enhances all the flavors and strengthens the dough.
- 1 cup warm milk: Warm milk activates the yeast and gives the dough a tender crumb—whole or reduced-fat works like a charm.
- 2 tablespoons vegetable oil: Helps keep the buns soft and moist with a subtle richness.
- 1 large egg: Adds richness and contributes to the dough’s structure.
- 1 beaten egg for egg wash: Brushed on top to create that irresistible golden brown, glossy crust.
How to Make Hour Hot Dog Buns, Homemade Hot Dog Buns
Step 1: Mix the Dry Ingredients
Begin by combining the all-purpose flour, instant yeast, sugar, and salt in a large bowl. Stirring well ensures that every part of your dough will rise evenly and have a balanced flavor. Mixing dry ingredients first is the foundation for a perfect dough texture.
Step 2: Add the Wet Ingredients
Next, pour in the warm milk, vegetable oil, and beaten egg. Mixing everything by hand or with a stand mixer for about 2 minutes creates a sticky, luscious batter that is the promise of soft buns to come. This sticky stage is important, as it allows the dough to hydrate properly before you add extra flour.
Step 3: Form the Dough
Gradually add up to ¼ cup of extra flour until the dough pulls away from the sides of the bowl and starts to become a soft, shaggy mass. This step balances stickiness with workability so that the dough will be easy to knead but still tender.
Step 4: Knead the Dough
Turn out the dough onto a floured surface and knead for about 5 minutes or 50 turns, or crank it out in a stand mixer with a dough hook for 3 minutes. Kneading develops the gluten so your buns will rise to their fluffy potential and hold their shape without being tough.
Step 5: Rest the Dough
Give your dough a quick 10-minute rest covered with a clean towel. This brief pause relaxes gluten strands, making shaping your buns easier and the texture more tender in the final product.
Step 6: Shape the Buns
Divide the dough into 8 equal pieces, flatten each piece into a 4-by-6-inch rectangle, then roll tightly from the long side into a log. Tuck in the ends to shape classic hot dog buns that will hold their fillings nicely.
Step 7: Let the Buns Rise
Place your shaped buns seam-side down on a parchment-lined baking sheet. Cover and let them rise for 30 minutes in a warm, draft-free spot until doubled in size. This rise ensures plush, airy buns packed with that freshly baked charm.
Step 8: Apply Egg Wash and Bake
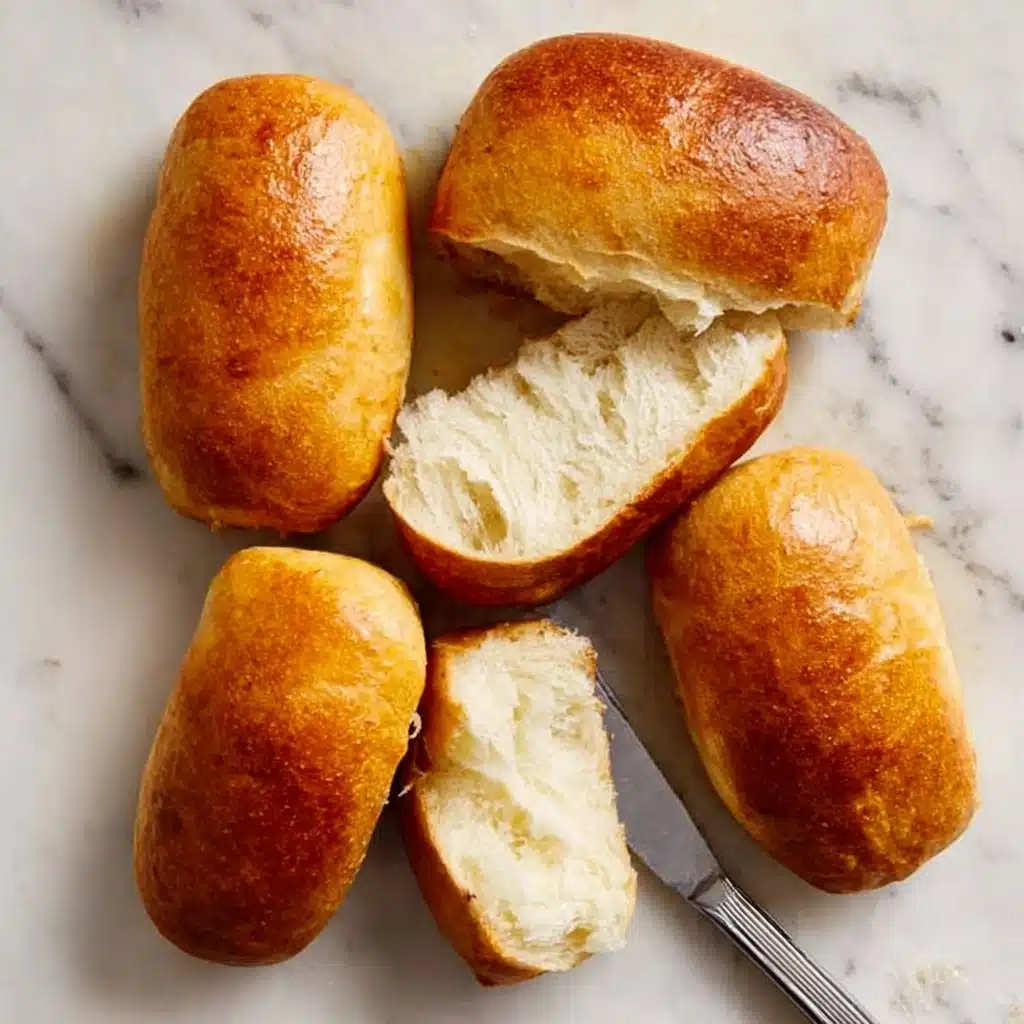
Preheat your oven to 375°F. Brush each bun with beaten egg for a glossy finish that will bake into a beautiful golden crust. Bake for about 12 minutes until the tops turn golden brown and the buns sound hollow when tapped—a sure sign they’re perfectly baked inside.
Step 9: Cool Before Serving
Cooling your buns on a wire rack for at least 10 minutes before slicing is key to maintaining their structure and softness. It lets the crumb set so your buns won’t squish under the weight of your favorite fillings.
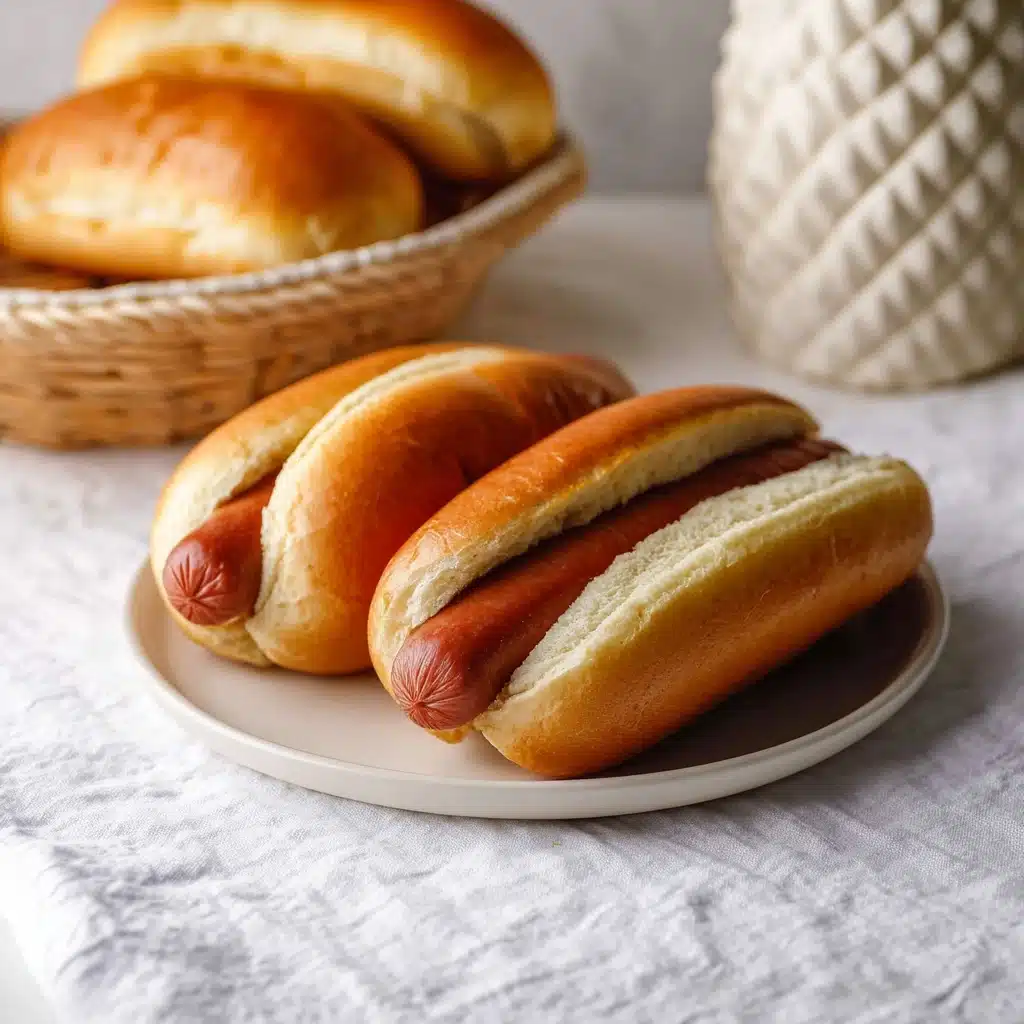
How to Serve Hour Hot Dog Buns, Homemade Hot Dog Buns
Garnishes
Nothing beats loading up your homemade hot dog buns with classic garnishes like tangy mustard, zesty ketchup, fresh diced onions, and sweet relish. Feel adventurous? Try creamy coleslaw or spicy jalapeño slices for that extra pop. The warm, soft buns are perfect for holding all these flavors without falling apart.
Side Dishes
Pair your hot dog masterpiece with crisp, crunchy fries or a fresh green salad to balance the indulgence. Homemade potato chips or a bowl of pickled veggies can add refreshing texture contrasts and keep the meal exciting.
Creative Ways to Present
If you’re feeling creative, slice your hour hot dog buns open but keep them connected at one edge, then stuff them with unique fillings like grilled sausages topped with sautéed mushrooms and melted cheese. You can also turn the buns into sliders by trimming them smaller and filling them with mini franks and slaw for a party platter everyone will love.
Make Ahead and Storage
Storing Leftovers
Store any leftover homemade hot dog buns in an airtight container or ziplock bag at room temperature for up to 2 days. This keeps them soft and fresh enough to enjoy as if they were just baked. Avoid refrigerating as it can dry them out.
Freezing
For longer storage, freeze the buns in a freezer-safe bag or container for up to 3 months. To freeze best, first cool them completely, then wrap them tightly with plastic wrap and foil to prevent freezer burn.
Reheating
To reheat, let the buns thaw at room temperature, then warm them in a 350°F oven for 5-7 minutes. For extra softness, wrap them in foil while warming. Alternatively, a quick microwave zap wrapped in a damp paper towel will revive their fluffiness in no time.
FAQs
Can I use active dry yeast instead of instant yeast?
Yes! If you swap in active dry yeast, warm your milk between 110 and 120°F and give the yeast about 5 minutes to bloom before mixing it with other ingredients for best results.
Why is the dough sticky at first?
The initial stickiness means your dough is well-hydrated, which helps produce soft buns. Adding flour gradually and kneading transforms this sticky mess into a supple, elastic dough.
Do I need to use an egg wash?
While egg wash is not mandatory, it gives the buns their signature shiny, golden-brown crust and improves their visual appeal, making them look professionally baked.
Can I make these buns vegan?
To make a vegan version, substitute the milk with a plant-based alternative like almond or oat milk, and replace the egg and egg wash with flax egg or a plant-based egg replacer. The texture may be slightly different but still delicious.
Is it necessary to let the buns cool before slicing?
Cooling sets the crumb so the buns won’t squish or tear when sliced. Waiting at least 10 minutes is recommended to keep your buns perfectly shaped.
Final Thoughts
Making Hour Hot Dog Buns, Homemade Hot Dog Buns is one of those simple joys that turns an everyday meal into something special. With just a little effort and accessible ingredients, you get fresh, soft buns that hold up to all your favorite toppings and fillings. Dive into this recipe and impress your family and friends with that unmistakable homemade touch—once you try it, you’ll never want store-bought buns again!
PrintHour Hot Dog Buns, Homemade Hot Dog Buns Recipe

These homemade hot dog buns are soft, fluffy, and quick to make—ready in about an hour! Perfectly shaped and golden-baked, they provide the ideal vessel for your favorite hot dogs or sausages. With simple pantry ingredients and an easy process, these buns are a delightful upgrade from store-bought options.
- Prep Time: 15 minutes
- Cook Time: 12 minutes
- Total Time: 1 hour 10 minutes
- Yield: 8 hot dog buns 1x
- Category: Bread, Snack
- Method: Baking
- Cuisine: American
- Diet: Halal
Ingredients
Dry Ingredients
- 2 ½ cups all-purpose flour (plus about ¼ cup extra as needed)
- 2 teaspoons instant yeast (or 1 packet / 7g)
- 2 tablespoons sugar
- 1 teaspoon salt
Wet Ingredients
- 1 cup milk (whole or reduced-fat), heated to 120–130°F for instant yeast or 110–120°F for active dry yeast
- 2 tablespoons vegetable oil
- 1 large egg
For Egg Wash
- 1 beaten egg
Instructions
- Mix the Dry Ingredients: In a large mixing bowl, combine the all-purpose flour, instant yeast, sugar, and salt, stirring well to distribute everything evenly.
- Add the Wet Ingredients: Pour in the warm milk, followed by the vegetable oil and a beaten egg. Mix vigorously by hand or with a stand mixer for about 2 minutes until a sticky batter forms.
- Form the Dough: Add about ¼ cup of additional flour gradually until the dough begins to form a soft, shaggy mass that pulls away from the sides of the bowl.
- Knead the Dough: Transfer the dough to a floured surface and knead by hand for about 5 minutes or 50 turns, or until smooth and elastic. If using a stand mixer with a dough hook, knead for about 3 minutes.
- Rest the Dough: Cover the dough and let it rest for 10 minutes. This short resting period relaxes the gluten, making the dough easier to shape.
- Shape the Buns: Divide the dough into 8 equal pieces. Flatten each into a 4-by-6-inch rectangle. Roll tightly from the long side into a log shape and tuck in the ends to form a classic hot dog bun shape.
- Let the Buns Rise: Place the buns seam-side down on a parchment-lined baking sheet. Cover with a clean kitchen towel and let them rise in a warm, draft-free area for 30 minutes, or until doubled in size.
- Apply Egg Wash and Bake: Preheat the oven to 375°F. Brush each bun gently with beaten egg for a shiny golden crust. Bake for 12 minutes or until the tops are golden brown and the buns sound hollow when tapped.
- Cool Before Serving: Allow the buns to cool on a wire rack for at least 10 minutes before slicing or serving. This helps set the structure and prevents squishing.
Notes
- Use warm milk as specified to activate the yeast effectively.
- If you prefer a dairy-free version, substitute milk with almond or oat milk and use oil accordingly.
- Ensure buns are fully cooled before slicing to prevent tearing or compression.
- For fluffier buns, do not over-flour the dough when kneading.
- Store leftover buns in an airtight container at room temperature for up to 3 days or freeze for longer storage.
Nutrition
- Serving Size: 1 bun (approximately 70g)
- Calories: 160 kcal
- Sugar: 3 g
- Sodium: 180 mg
- Fat: 4 g
- Saturated Fat: 1 g
- Unsaturated Fat: 3 g
- Trans Fat: 0 g
- Carbohydrates: 27 g
- Fiber: 1 g
- Protein: 5 g
- Cholesterol: 40 mg
Keywords: hot dog buns, homemade bread, quick bread recipe, soft hot dog buns, easy bread, baking, sandwich buns