Delicious Cheesy Garlic Bombs Recipe for Easy Snacking Recipe
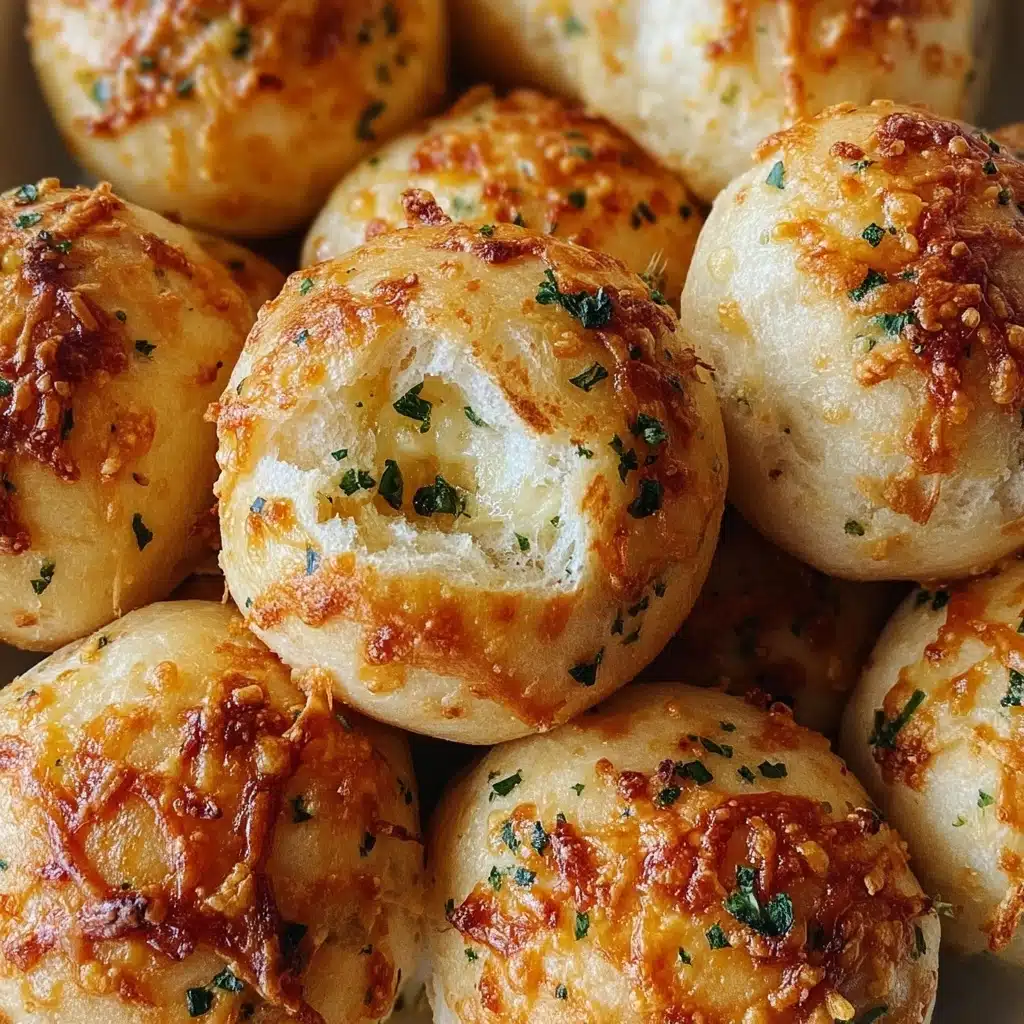
If you are on the hunt for a snack that combines ooey-gooey cheese with the bold punch of garlic, look no further than this Delicious Cheesy Garlic Bombs Recipe for Easy Snacking. These golden, pillowy bites are bursting with rich mozzarella and creamy ricotta, perfectly seasoned with fresh herbs and a touch of spice. Whether you’re entertaining guests or craving a cozy treat, these cheesy garlic bombs are the ultimate comfort food that’s simple to make and impossible to resist.

Ingredients You’ll Need
Getting the ingredients together for this recipe is a breeze because each one plays a key role in creating the perfect cheesy garlic bombs. From the fluffy dough to the savory filling, every component adds to the irresistible flavor and texture you’ll enjoy in every bite.
- 2 cups all-purpose flour: Provides the soft, sturdy base for these delectable bombs.
- 1 tablespoon baking powder: Ensures a light and fluffy dough texture.
- 1 teaspoon salt: Balances the flavors and enhances the taste of the cheese and herbs.
- ¾ cup milk: Adds moisture and richness to the dough.
- 3 tablespoons unsalted butter, melted: Brings tenderness and a subtle buttery flavor to the dough.
- 1 cup shredded mozzarella cheese: Perfect for that classic melty stretch we all love in cheesy snacks.
- 1 cup ricotta cheese: Adds creamy texture and mildness to complement the mozzarella.
- 4 cloves garlic, minced: Infuses the filling with vibrant, aromatic garlic flavor.
- ¼ cup chopped fresh parsley: Brings a fresh, bright herbaceous note and a pop of color.
- ½ teaspoon red pepper flakes (optional): Offers a gentle kick of heat for those who enjoy a little spice.
- 1 egg, beaten (for egg wash): Creates a shiny, golden crust on top of the bombs.
- Olive oil for drizzling: Adds a subtle richness and helps with browning during baking.
How to Make Delicious Cheesy Garlic Bombs Recipe for Easy Snacking
Step 1: Preheat and Prepare
Start by preheating your oven to 400°F (200°C). This ensures a perfectly hot environment to bake your cheesy garlic bombs so they develop that desirable golden crust. While the oven heats, line a baking sheet with parchment paper for easy cleanup and to keep the bottoms from sticking.
Step 2: Mix the Dry Ingredients
In a large mixing bowl, whisk together the flour, baking powder, and salt until the mixture is uniform. This is the foundation that will give your dough just the right lift and flavor balance. Taking a moment here ensures a smooth dough later on.
Step 3: Combine the Wet Ingredients
In a separate bowl, blend the milk with melted unsalted butter. The warmth of the butter melds nicely with the milk for a smooth mix. Gradually pour this into the dry ingredients, stirring gently until a sticky dough starts to form, bringing the two halves of your bomb together.
Step 4: Knead the Dough
Lightly flour a clean surface and transfer the dough onto it. Knead it for about 2 to 3 minutes. This small but essential step helps develop the dough’s structure, making it pliable and ready to hold all that cheesy goodness inside without bursting.
Step 5: Prepare the Cheese Filling
In another bowl, combine shredded mozzarella, ricotta, minced garlic, fresh parsley, and if you like a little heat, sprinkle in some red pepper flakes. Mix everything thoroughly so each bite is packed with flavor and creamy textures that perfectly complement the bread exterior.
Step 6: Form the Bombs
Divide your dough into 12 equal portions. Flatten each piece gently into a small circle, then spoon a generous scoop of the cheese mixture right in the center. This stage is all about balance — too little filling and you’ll miss out on the magic, too much and the bombs might burst.
Step 7: Seal the Bombs
Carefully fold the edges of each dough circle over the cheese filling. Pinch and pinch again to seal them tightly, making sure all that cheesy treasure stays inside. You want a nice round ball shape, which helps the dough puff perfectly around the filling as it bakes.
Step 8: Apply Egg Wash and Olive Oil
Place each cheesy garlic bomb on your parchment-lined baking sheet. Brush the tops generously with the beaten egg — this will give your bombs their irresistible glossy finish. Then, drizzle a little olive oil over each for extra flavor and browning as they bake.
Step 9: Bake to Golden Perfection
Pop those beauties into your preheated oven and bake for 15 to 20 minutes. You’ll know they’re ready when they’re puffed up, golden brown, and sending buttery garlic aromas through your kitchen. Let them cool for just a minute or two before indulging.
How to Serve Delicious Cheesy Garlic Bombs Recipe for Easy Snacking
Garnishes
Sprinkle freshly chopped parsley or a little grated Parmesan cheese right on top for a fresh, colorful finish. You can also add a touch of flaky sea salt once they come out of the oven to boost the flavors and add texture.
Side Dishes
These cheesy garlic bombs pair wonderfully with a lightly dressed green salad or simple marinara sauce for dipping. The contrast between the crunchy greens or tangy tomato sauce and the warm, melty cheese bombs is simply unbeatable.
Creative Ways to Present
For a casual gathering, serve these on a rustic wooden board sprinkled with extra parsley and a small bowl of marinara or even a smoky chipotle mayo. You could also skewer a few bombs on toothpicks for a fun finger-food presentation that’s perfect for parties or movie nights.
Make Ahead and Storage
Storing Leftovers
If you have any leftover cheesy garlic bombs, store them in an airtight container at room temperature for up to 24 hours. They’re best enjoyed fresh but will still be delicious the next day.
Freezing
You can freeze unbaked bombs by placing them on a tray until frozen solid, then transferring them to a freezer-safe bag. When you’re ready to enjoy, bake from frozen, adding a few extra minutes to the baking time.
Reheating
To reheat, place the cheesy garlic bombs in a preheated oven at 350°F (175°C) for about 10 minutes. This restores their crisp exterior and melty interior better than a microwave ever could.
FAQs
Can I use other types of cheese?
Absolutely! While the mozzarella and ricotta combo is classic for its melting qualities and creaminess, feel free to experiment with cheddar, Monterey Jack, or even a bit of parmesan for different flavor notes.
Is it possible to make these vegetarian?
Yes, this recipe is naturally vegetarian as it contains no meat products. Just ensure your cheeses don’t contain animal rennet if you want to keep it strictly vegetarian.
Can I make the dough vegan?
For a vegan version, you would need to substitute dairy milk and butter with plant-based alternatives, and use vegan-friendly cheese or a homemade filling. Keep in mind the texture and taste will differ but can still be delicious.
What’s the best way to prevent the bombs from bursting?
Make sure to pinch the dough edges together very tightly and avoid overfilling. If necessary, use a little water on the edges to help seal the dough better before baking.
Can I add herbs or spices to the dough?
Definitely! Adding herbs like oregano or basil or spices like smoked paprika to the dough can add an extra layer of flavor. Just mix them into the dry ingredients before combining with wet.
Final Thoughts
There is something utterly comforting and joyous about biting into one of these cheesy garlic bombs fresh from the oven, with melted cheese oozing out and the warm hint of garlic singing on your taste buds. I can’t recommend enough giving this Delicious Cheesy Garlic Bombs Recipe for Easy Snacking a try—it’s a surefire way to brighten up any day, satisfy snack cravings, and impress family and friends alike. Trust me, once you make these, they’ll become a go-to favorite in your snack arsenal.
PrintDelicious Cheesy Garlic Bombs Recipe for Easy Snacking Recipe

These Delicious Cheesy Garlic Bombs are perfect for easy snacking, featuring a soft dough filled with a flavorful mixture of mozzarella, ricotta, garlic, and parsley, baked to golden perfection. Ideal as an appetizer or party treat, they combine gooey cheese and aromatic garlic in every bite.
- Prep Time: 20 minutes
- Cook Time: 20 minutes
- Total Time: 40 minutes
- Yield: 12 cheesy garlic bombs 1x
- Category: Snack/Appetizer
- Method: Baking
- Cuisine: Italian-American
- Diet: Vegetarian
Ingredients
Dough Ingredients
- 2 cups all-purpose flour
- 1 tablespoon baking powder
- 1 teaspoon salt
- ¾ cup milk
- 3 tablespoons unsalted butter, melted
Cheese Filling
- 1 cup shredded mozzarella cheese
- 1 cup ricotta cheese
- 4 cloves garlic, minced
- ¼ cup chopped fresh parsley
- ½ teaspoon red pepper flakes (optional)
Finishing
- 1 egg, beaten (for egg wash)
- Olive oil for drizzling
Instructions
- Preheat the Oven: Preheat your oven to 400°F (200°C). Line a baking sheet with parchment paper to prevent sticking and ensure easy cleanup.
- Mix Dry Ingredients: In a large mixing bowl, whisk together the flour, baking powder, and salt until well combined, creating the base for your dough.
- Combine Wet Ingredients: In a separate bowl, mix the milk with the melted butter. Gradually pour this wet mixture into the dry ingredients, stirring continuously until a soft dough forms.
- Knead the Dough: Lightly flour a clean surface and knead the dough gently for about 2-3 minutes until it becomes smooth and elastic, which helps develop the texture.
- Prepare the Cheese Filling: In another bowl, combine the shredded mozzarella, ricotta cheese, minced garlic, chopped parsley, and red pepper flakes (if using), mixing well to evenly distribute flavors.
- Form the Bombs: Divide the dough into 12 equal portions. Flatten each piece into a small circle and spoon a generous amount of cheese filling into the center of each circle.
- Seal the Bombs: Carefully fold the dough edges over the filling and pinch them tightly to seal, shaping each into a ball to keep the cheese enclosed during baking.
- Egg Wash: Arrange the sealed bombs on the prepared baking sheet. Brush the tops gently with the beaten egg to promote browning and shine, then drizzle a little olive oil over each for added crispness.
- Bake: Place the baking sheet in the oven and bake for 15-20 minutes, or until the bombs are puffed up and golden brown, signaling they are fully cooked.
- Serve Warm: Remove the cheesy garlic bombs from the oven and allow them to cool slightly for a couple of minutes before serving for optimal flavor and to avoid burns. Enjoy them with marinara sauce if desired!
Notes
- For extra heat, increase the red pepper flakes or add a dash of cayenne pepper to the cheese filling.
- To store, keep leftovers in an airtight container in the refrigerator for up to 3 days; reheat in the oven to maintain crispness.
- These bombs freeze well; freeze before baking and bake directly from frozen, adding a few extra minutes to the baking time.
- Use gluten-free flour as a substitute for a gluten-free version.
- Serve with marinara or garlic aioli for dipping to enhance flavor.
Nutrition
- Serving Size: 1 cheesy garlic bomb
- Calories: 180 kcal
- Sugar: 1.5 g
- Sodium: 320 mg
- Fat: 9 g
- Saturated Fat: 4.5 g
- Unsaturated Fat: 3 g
- Trans Fat: 0 g
- Carbohydrates: 18 g
- Fiber: 1 g
- Protein: 7 g
- Cholesterol: 40 mg
Keywords: cheesy garlic bombs, garlic bombs recipe, easy snack, cheesy snack, baked cheese bombs, party appetizer, mozzarella ricotta bombs