Cotton Candy Cookies Recipe – Fun & Sweet Dessert Recipe
Introduction
These Cotton Candy Cookies are a fun and sweet dessert that brings a nostalgic twist to your cookie jar. Soft, chewy, and bursting with cotton candy flavor, they’re perfect for parties or a whimsical treat anytime.

Ingredients
- 1 cup (2 sticks) unsalted butter, softened to room temperature
- 1 cup granulated sugar
- 1 large egg, at room temperature
- 1 teaspoon vanilla extract
- ½ teaspoon cotton candy extract
- 2 cups all-purpose flour
- ½ teaspoon baking powder
- ¼ teaspoon salt
- ½ cup pink and blue cotton candy, torn into small pieces
- Pink and blue food coloring (gel preferred, optional)
- Extra cotton candy for garnish (optional)
Instructions
- Step 1: Preheat your oven to 350°F (175°C) and line a baking sheet with parchment paper or a silicone baking mat to prevent sticking and ease cleanup.
- Step 2: In a large bowl, cream together the softened butter and granulated sugar on medium-high speed until light and fluffy, about 2-3 minutes, using an electric or stand mixer with a paddle attachment.
- Step 3: Add the egg, vanilla extract, and cotton candy extract to the butter-sugar mixture. Beat on medium speed until smooth and creamy, about 1 minute, scraping down the sides as needed.
- Step 4: In a separate bowl, whisk together the flour, baking powder, and salt until evenly combined.
- Step 5: Gradually add the dry ingredients to the wet mixture, mixing on low speed after each addition until just combined. Avoid overmixing to keep the cookies tender.
- Step 6: Gently fold in the torn cotton candy pieces using a rubber spatula, distributing them evenly. Work quickly as the cotton candy may dissolve slightly.
- Step 7: (Optional) Divide the dough into two portions and add pink food coloring to one and blue to the other. Mix gently to distribute color and twist together lightly for a marbled effect.
- Step 8: Scoop the dough into 1-inch balls (about 2 tablespoons each) and place them on the prepared baking sheet with about 2 inches between each cookie. Slightly flatten the tops with your palm or the bottom of a glass.
- Step 9: Bake for 9-11 minutes, or until the edges are set but the centers look slightly underdone. Remove from oven and let cool on the baking sheet for 5 minutes.
- Step 10: Transfer the cookies to a wire rack to cool completely. For extra flair, press small pieces of cotton candy on top while cookies are still warm.
Tips & Variations
- Use gel food coloring for more vibrant colors without altering dough consistency.
- Work quickly when folding in cotton candy to prevent it from fully dissolving into the dough.
- Try substituting cotton candy extract with vanilla or almond extract for a different flavor twist.
- For a festive look, swirl the pink and blue dough lightly instead of fully mixing for a marbled effect.
Storage
Store completely cooled cookies in an airtight container at room temperature. They stay fresh up to 5 days but are best enjoyed within 2-3 days for optimal softness and flavor. Reheat gently in the microwave for a few seconds if desired.
How to Serve
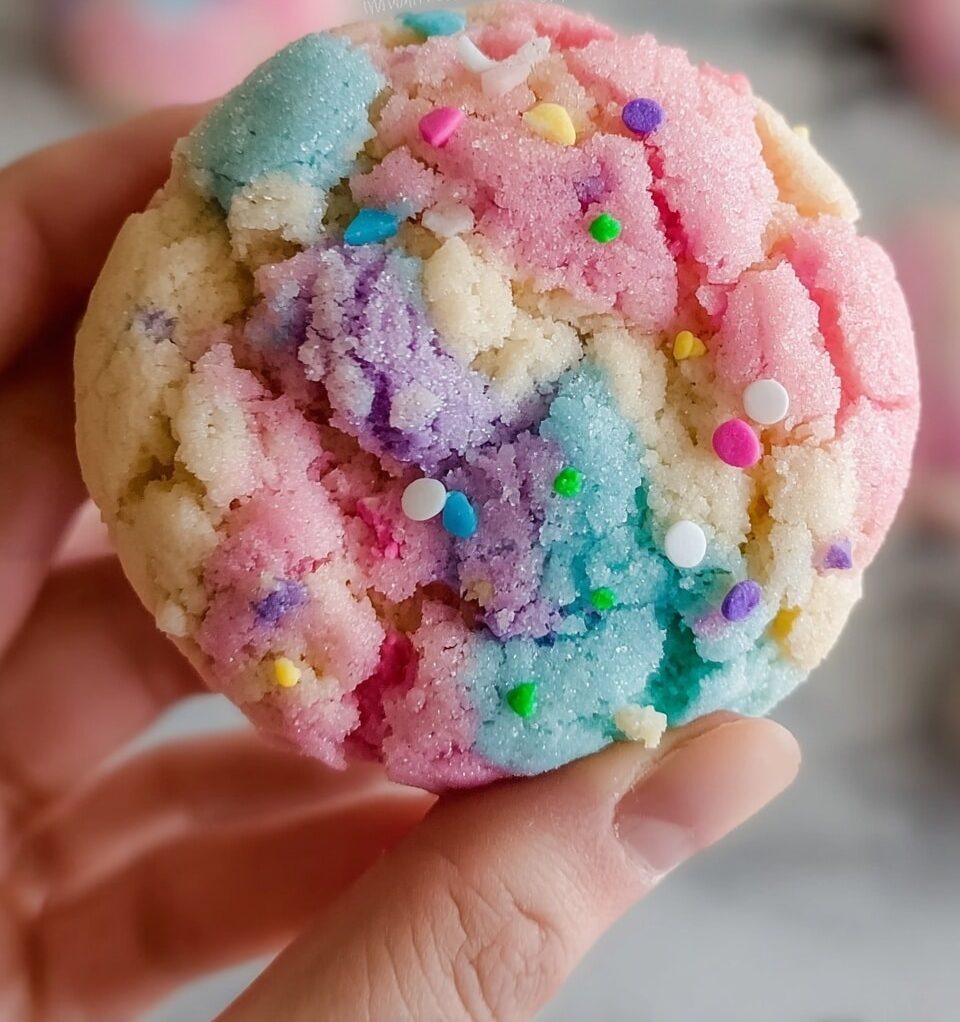
Serve this delicious recipe with your favorite sides.
FAQs
Can I use regular food coloring instead of gel?
Yes, but gel food coloring is preferred as it provides more vibrant color without thinning the dough. If using regular food coloring, add very small amounts to avoid changing dough consistency.
Will the cotton candy pieces melt completely during baking?
The candy pieces will soften and dissolve slightly but will still add pockets of sweetness and a fun texture inside the cookies.
PrintCotton Candy Cookies Recipe – Fun & Sweet Dessert Recipe
These Cotton Candy Cookies are a fun and sweet dessert featuring a soft, chewy texture infused with the whimsical flavor of cotton candy. Perfectly colored in pink and blue hues with optional marbled effect, these cookies are delightful to bake and enjoy for special occasions or anytime you crave a playful treat.
- Prep Time: 15 minutes
- Cook Time: 10 minutes
- Total Time: 25 minutes
- Yield: 24 cookies 1x
- Category: Dessert
- Method: Baking
- Cuisine: American
Ingredients
Wet Ingredients
- 1 cup (2 sticks) unsalted butter, softened to room temperature
- 1 cup granulated sugar
- 1 large egg, at room temperature
- 1 teaspoon vanilla extract
- ½ teaspoon cotton candy extract
Dry Ingredients
- 2 cups all-purpose flour
- ½ teaspoon baking powder
- ¼ teaspoon salt
Add-ins and Garnish
- ½ cup pink and blue cotton candy, torn into small pieces
- Pink and blue food coloring (gel preferred, optional)
- Extra cotton candy for garnish (optional)
Instructions
- Preheat the oven: Preheat your oven to 350°F (175°C). Line a baking sheet with parchment paper or a silicone baking mat to prevent sticking and ease cleanup.
- Cream butter and sugar: In a large bowl, use an electric mixer to cream the softened butter and granulated sugar on medium-high speed until light and fluffy, about 2-3 minutes. This step creates air pockets important for a soft, chewy texture.
- Add wet ingredients: Add the egg, vanilla extract, and cotton candy extract to the butter and sugar mixture. Beat on medium speed until fully incorporated and smooth, about 1 minute. Scrape the sides of the bowl as needed.
- Combine dry ingredients: In a separate bowl, whisk together the all-purpose flour, baking powder, and salt to evenly distribute the leavening and salt.
- Mix wet and dry ingredients: Gradually add the dry ingredients to the wet ingredients, mixing on low speed after each addition until just combined. Avoid overmixing to keep the cookies tender; the dough should be soft but not sticky.
- Add cotton candy pieces: Gently fold in the torn cotton candy pieces using a rubber spatula, distributing them evenly. Work quickly as cotton candy will dissolve when moist.
- Color the dough (optional): If desired, divide the dough in half and add a few drops of pink food coloring to one half and blue to the other. Mix gently until color is evenly distributed. For a marbled look, lightly twist the two colored dough portions together without fully combining.
- Form cookie dough balls: Using a cookie scoop or tablespoon, portion dough into 1-inch balls (about 2 tablespoons each). Place on prepared baking sheet with about 2 inches between cookies. Slightly flatten tops with your palm or the bottom of a glass.
- Bake the cookies: Bake in the preheated oven for 9-11 minutes, until edges are set and centers appear slightly underdone. The residual heat will finish baking the cookies for a soft and chewy texture.
- Cool and garnish: Let cookies cool on the baking sheet for 5 minutes, then transfer to a wire rack to cool completely. Optionally, press small pieces of cotton candy onto cookies while warm for a decorative effect.
- Store properly: Once cooled, store in an airtight container at room temperature for up to 5 days, best within 2-3 days for optimal freshness and texture.
Notes
- Work quickly when folding in cotton candy pieces to prevent it from dissolving too much in the dough.
- Do not overbake – cookies should look slightly underdone in the center to remain soft and chewy.
- Use gel food coloring for more vibrant colors without altering dough consistency.
- Storing the cookies in an airtight container helps maintain freshness.
- You can experiment with different cotton candy flavors to customize the taste.
Keywords: cotton candy cookies, colorful cookies, soft chewy cookies, fun dessert, sweet treats, cotton candy extract


