Choco Hazelnut Truffles Recipe
Introduction
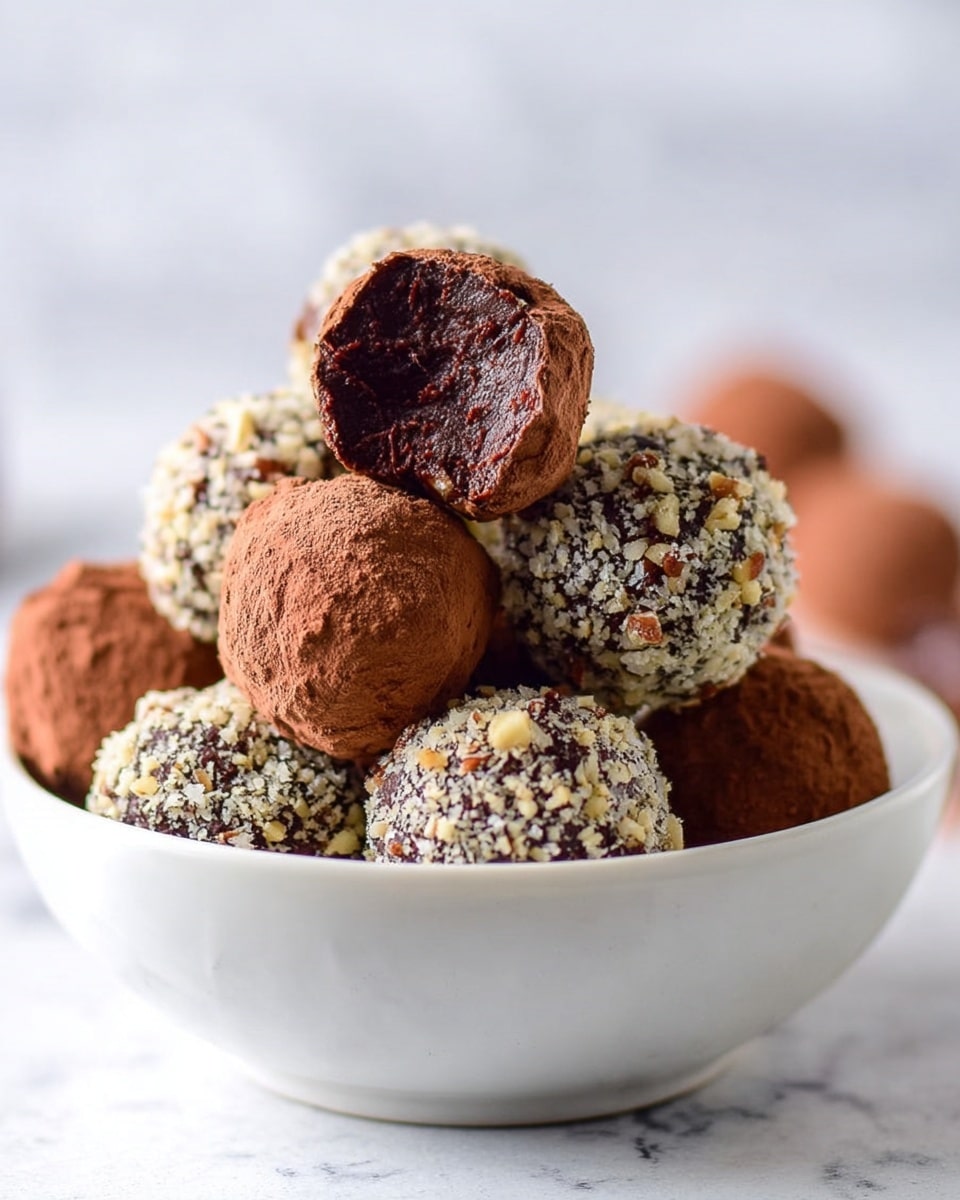
Choco Hazelnut Truffles are a decadent treat combining rich milk chocolate with the nutty flavor of hazelnuts. These homemade truffles feature a smooth chocolate hazelnut spread center, coated in melted chocolate and finished with crushed hazelnuts for a satisfying crunch.
Ingredients
- 2 cups roasted hazelnuts, skins removed
- 1/4 cup confectioner’s sugar
- 3 Tbsp cocoa powder
- 1 Tbsp vanilla extract
- 4 Tbsp vegetable oil (e.g., almond oil)
- 1 cup milk chocolate melting wafers, melted (such as Ghirardelli)
- 16 ounces milk chocolate melting wafers (such as Ghirardelli)
- 1 Tbsp butter
- 1/4 cup roasted hazelnuts, crushed
Instructions
- Step 1: Prepare the chocolate hazelnut spread a day ahead. Place the roasted and skinned hazelnuts in a high-speed blender. Process until smooth, scraping the sides as needed. This may take about 5 minutes to reach a shiny, almost liquid butter.
- Step 2: Add confectioner’s sugar, cocoa powder, vanilla extract, and vegetable oil to the hazelnut butter. Blend again until the mixture is smooth and silky, scraping down the sides during blending.
- Step 3: Transfer the spread to a clean jar. Let it cool to room temperature, then cover and refrigerate overnight.
- Step 4: Once chilled, use a small scoop (about 1 inch) to portion the spread into balls. Place them on a lined tray and freeze for 30 minutes.
- Step 5: Divide the 16 ounces of chocolate wafers and butter between two microwave-safe bowls. Microwave one bowl on high for one minute, then stir until melted. Let cool slightly.
- Step 6: Remove half the truffles from the freezer. Dip each into the melted chocolate to coat fully, then place on a lined tray. While the chocolate is still wet, dust with crushed hazelnuts.
- Step 7: Allow the truffles to set at room temperature, then transfer to the refrigerator to store.
- Step 8: Repeat melting and dipping with the second batch of truffles.
Tips & Variations
- For a smoother hazelnut butter, use a high-speed blender instead of a food processor.
- Substitute almond or sunflower oil if desired, but avoid strong-flavored oils that could overpower the spread.
- Add a pinch of sea salt to the spread for a salted chocolate truffle variation.
- Use dark chocolate instead of milk chocolate for a richer, less sweet coating.
Storage
Store the truffles in an airtight container in the refrigerator for up to 2 weeks. For longer storage, freeze them for up to 3 months. When ready to enjoy, thaw in the refrigerator before serving.
How to Serve

Serve this delicious recipe with your favorite sides.
FAQs
Can I use store-bought hazelnut spread instead of making my own?
Yes, you can use store-bought hazelnut spread, but making your own provides a fresher flavor and control over sweetness and texture.
Do the truffles need to be kept refrigerated?
Yes, refrigerating the truffles ensures they stay firm and fresh. They become soft at room temperature but will firm up again when chilled.
PrintChoco Hazelnut Truffles Recipe

Delicious homemade Choco Hazelnut Truffles featuring a silky smooth hazelnut spread made from roasted hazelnuts and coated in rich milk chocolate with a dusting of crushed hazelnuts. Perfect for gifting or indulging in a decadent treat.
- Prep Time: 20 minutes
- Cook Time: 0 minutes
- Total Time: 12 hours 20 minutes (including chilling time)
- Yield: Approximately 30–35 truffles 1x
- Category: Dessert
- Method: No-Cook
- Cuisine: European
- Diet: Vegetarian
Ingredients
Hazelnut Spread
- 2 cups roasted hazelnuts, skins removed
- 1/4 cup confectioner’s sugar
- 3 Tbsp cocoa powder
- 1 Tbsp vanilla extract
- 4 Tbsp vegetable oil (such as almond oil)
- 1 cup milk chocolate melting wafers, melted (Ghirardelli recommended)
Truffle Coating
- 16 ounces milk chocolate melting wafers (Ghirardelli recommended)
- 1 Tbsp butter
- 1/4 cup roasted hazelnuts, crushed
Instructions
- Make the Chocolate Hazelnut Spread: Place the roasted, skinned hazelnuts in a high-speed blender. Blend until smooth, which can take about 5 minutes, stopping several times to scrape down the sides. The mixture will go from grainy to smooth and shiny.
- Add Remaining Spread Ingredients: Add confectioner’s sugar, cocoa powder, vanilla extract, vegetable oil, and 1 cup melted milk chocolate wafers to the hazelnut butter. Blend again until silky and smooth, scraping down sides as needed and gradually increasing blender speed.
- Cool and Refrigerate Spread: Transfer the spread to a clean jar, let cool to room temperature, then cap and refrigerate overnight to firm up flavors and texture.
- Form Truffle Balls: Once the spread is chilled, use a small 1-inch scoop or teaspoon to portion out balls and place them on a lined plate or tray. Freeze the shaped balls for 30 minutes to firm them up for coating.
- Prepare Chocolate Coating: Divide the 16 ounces of milk chocolate wafers and butter into two microwave-safe bowls. Microwave one bowl on high for 1 minute, then stir until fully melted and smooth. Let cool slightly.
- Dip Truffles in Chocolate: Remove half the truffles from the freezer. Dip each truffle completely into the melted chocolate, then place on a lined tray. Immediately sprinkle with crushed roasted hazelnuts while the chocolate is still wet. Allow to set at room temperature.
- Repeat Coating: Repeat melting and dipping process with the second batch of chocolate and remaining truffles.
- Storage: Store the truffles refrigerated for up to 2 weeks or freeze for up to 3 months. Enjoy chilled.
Notes
- Removing the skins from the hazelnuts enhances the smoothness of the spread.
- Using a high-speed blender yields the silkiest hazelnut butter compared to a food processor.
- You can make the hazelnut spread a day ahead to deepen flavors.
- Melting chocolate in small batches keeps the coating fresher and easier to work with.
- Keep truffles refrigerated or frozen to maintain texture and freshness.
- Use almond oil or another neutral vegetable oil for best flavor compatibility.
Keywords: chocolate hazelnut truffles, homemade truffles, hazelnut spread recipe, chocolate coating, no bake dessert